How To Make Garlic Bread (In OTG)
Garlic Bread Magic: Unleashing Flavours and Delights in Every Bite!
Imagine this: A warm slice of crusty bread layered with a generous amount of smooth butter and flavourful garlic! Garlic bread has an enticing aroma and a universal appeal. Whether you want an appetiser, a comfort snack, or an add-on to a hearty meal, garlic bread possesses an unbeatable charm that makes it the perfect snack. However, the best thing about it is that it is easy to make and gets ready within minutes. Read on to learn how to make garlic bread in an OTG, along with how to select the right bread, and use our expert tips to impress your diners.

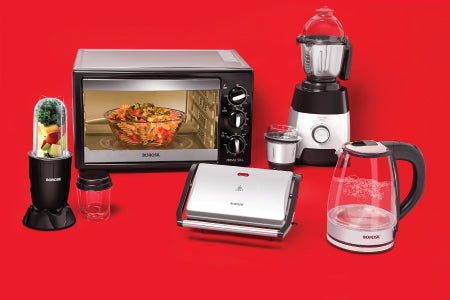
How to Make Garlic Bread in an Oven Toaster Grill?
‘Garlic bread’ is an effortless culinary masterpiece that can satisfy cravings and bring joy to any occasion. If you’re looking for a homemade garlic bread recipe, you’ve come to the right page! You can find the steps mentioned below:
Garlic Bread Preparation Step 1: Preheating the OTG
Before any other preparation, you have to prepare the stage for a loaf of excellent garlic bread. Preheat the OTG to around 180-200°C (356-392°F) for a standard garlic bread recipe. Doing so ensures you have the desired temperature ready when it is time to bake. The garlic bread gets cooked evenly and thoroughly. Allow the appliance to heat up completely before moving on to the next steps.
Garlic Bread Preparation Step 2: Bread Selection

The type of bread you use plays a pivotal role in how delicious the outcome is. Choose fresh, crusty bread to make crispy garlic bread in the oven. French baguettes, Italian bread, Sourdough, etc., are the most popular choices for garlic bread. Make sure that the loaf is fresh, not too dense, to get a better texture. Slice it lengthwise to create the base for your garlic bread.
Garlic Bread Preparation Step 3: Making the Garlic Butter

The true essence of garlic bread lies in the spread. To create a flavourful and rich garlic bread, you need softened butter, finely minced garlic and just a pinch of salt. Mix all the ingredients nicely until they get incorporated well. You can also mix herbs such as parsley, oregano or basil to add zest and depth and enhance the flavour. Adjust the quantities of each according to your taste preferences. Remember that garlic has an intense taste, so a little can go a long way.
Garlic Bread Preparation Step 4: Ingredients Assemble!

The next step in the garlic bread recipe is to assemble and prepare the loaf for baking. Once the garlic butter is done, take the sliced bread and generously spread the garlic butter mixture on each side. Coat the entire region evenly to maximise the flavour. Place the garlic bread on a baking sheet or an aluminium foil to prevent any mess or easily manage spills. Doing so also makes transferring the bread into the oven easier and helps clean up.
Garlic Bread Preparation Step 5: Getting the Golden Perfection
Now that you have preheated the oven and have the bread with the garlic butter mixture ready, you can place it in the OTG’s baking tray. When making garlic bread in the oven, make sure you place it in the centre and not too close to the heating elements, as this can cause the bread to get burned. How long to cook garlic bread in the oven? Bake it for approximately ten to fifteen minutes or until the bread turns golden brown. While the baking time may vary depending on the size and thickness of the bread used, you can until it looks to have a satisfying crunch. However, close and regular monitoring is recommended.
Garlic Bread Preparation Step 6: Creative Toppings
You can elevate the taste of your bread by adding creative toppings. While this step is absolutely optional, it gives a delightful twist to traditional garlic bread. Spread grated Parmesan cheese or a blend of different varieties of cheese on top of the garlic butter mixture before baking it. Doing so gives a cheesy and gooey garlic bread, a superhit with people of all ages. Add toppings such as oregano, olives, and basil leaves to decorate and infuse more flavour into the recipe. Try different combinations of toppings per your taste preferences and available ingredients.
Garlic Bread Preparation Step 7: Serving and Enjoying

To make the most of your home-cooked delicious garlic bread, you must also serve and enjoy it how it is meant to be! Use oven mitts when removing the bread from the oven and let it cool down slightly. Slice it into equal parts and serve it with mayonnaise or as a side dish with pasta, pizza or soup. The irresistible aroma and garlicky, buttery taste of garlic bread feel even better when made from scratch and baked to perfection in an OTG. Share this recipe with those looking for an easy ‘garlic bread recipe oven.'
Conclusion
Garlic bread is the perfect snack that combines simplicity with delectable flavours. Some of its deliciousness also lies in the fact that as it bakes, it fills the room with an irresistible aroma. The crispy exterior, the fluffy interior, and the rich, savoury notes of garlic create a delightful experience with every bite. Follow the above garlic bread recipe, easy steps and tips to make the classic recipe and add an extra touch of relish to any gathering or mealtime.
Frequently Asked Questions
1. Can I reheat garlic bread?
Garlic bread is best when served and eaten fresh. You can reheat it for a few minutes until it is warm. But don't overheat it, as it can dry out the bread.
2. Can I use garlic powder instead of fresh garlic?
You can use garlic powder instead of fresh garlic in garlic bread. However, the flavour may differ slightly. Go for one spoonful of garlic powder for every two tablespoons of butter.
3. Can I store garlic bread in the freezer?
Yes, you can freeze garlic bread for two to three months. Ensure you wrap the baked garlic bread in aluminium foil and store it in an airtight container. Thaw and reheat it in the oven until thoroughly warmed.

